I'm working through Idleworm's tutorial on how to animate a walk cycle. At first, I was going to do an Arrietty walk cycle, but Cornell wanted a very simple character, so simple it shall be. I'm using Idleworm's basic character.
I'm sorry I don't have any images for you today. I've finished the first contact pose (frame 1) and now I'm working on the seventh frame, or the second contact pose. It's difficult to reverse the sizing on the legs, but that's about all I have to say for it at the moment. I'll work it out.
Wednesday, December 19, 2012
Thursday, December 13, 2012
Apophysis
Apophysis is a program for creating fractal flames, similar to FLAM3. It's free to download and relatively simple to use -- it's possible create interesting compositions without much knowledge of the program or the mathematical concepts behind it.
The program is based on fractals. A fractal is a geometric shape that's very complex and often appears in nature. Fractals are typically self similar, meaning (in simple terms) that they can be constructed out of infinite quantities of smaller versions of themselves. I've been looking around, and I've discovered that it has something to do with the concept that if one were to continually decrease the unit of measurement on a jagged object, the object would be infinitely large (The Coastline Paradox.) Some common examples of fractals include the Sirpinski Triangle and Koch's Snowflake. . Fractals can have fractional dimension... a concept which I'm still working to understand..but instead of being 1D or 2D or even 3D... they can have non integral dimensions, if fractal dimension is defined as the "log of the number of self similar pieces divided by the log of the magnification factor" (taken from http://math.bu.edu/DYSYS/chaos-game/node6.html#SECTION0006000000000000000)
... If you want to understand the math better, I'd suggest you go hunting yourself. It's difficult to teach about a topic I don't nearly grasp myself.
Apohysis crates, as I stated above, fractal flames. Fractal flames are a type of iterated function system (IFS.) An IFS is a fractal constructed by the combination of several copies of itself, the Sierpinski Triangle being an example. (Wait a second... then what makes it necessary to call an iterated function system an iterated function system and not a fractal? No clue. Fractal flames differ from normal iterated function systems, all though the information as to how they do so does not yet make sense to me, so I won't share it with you. You can look on your own. The Wikipedia page on fractal flames has fantastic information about the mathematics behind the functions used in the program.
Apohysis then, is a fractal editor.
This is the Editor box in the program. As you can see, it's based off of triangles which you can modify- position, dimensions, rotation, etc. You can add triangles and delete them, too. That in turn influences the flame. Under name, you have several options you can apply to your flame, from items like swirl and spherical to gaussian blur. I suppose that perhaps these are shapes and photoshop-esque filters you can apply to the appearance of your flame, but I haven't experimented with the program enough to know exactly what they do. You can influence the values of each of these options as well.
This is the adjustment window. In gradient, you can influence color scheme. Brightness, in the flame above, seemed to influence the brightness at the center, which in turn radiated outward. Vibrancy, on the other hand, seemed to influence the brightness of each individual pixel of the flame. Gamma seems to influence the concentration of the pixels. When brought up, the pixels spread out. When brought down, they concentrate towards a center.
The program also provides a set of mutations you can apply to the flame as you progress through its creation.
It's difficult to apply constraints to the program, or define exactly what it does. It's something you play with, and things turn out.
The program is used for making things like nebuli... or is it nebulas? I'm not sure. It's also used for artwork. ElectricSheep uses it to make screen savers
I encourage you to try it!!!
Wow, what a post! Took me a while!
Have fun!
-Yume
Tuesday, December 11, 2012
First Ever Walk Cycle- Complete!
Tada! A primitive walk cycle created from the references at http://www.angryanimator.com/word/ and http://www.idleworm.com/how/anm/02w/walk1.shtml. The image I used to create this is not my own. I simply chopped up his reference:
This reference lacks the in-between poses that would be needed for a final project, but that's okay. I'm just using this to figure out how things would work if I were to create an actual walk cycle. The next step will be to finish reading through his tutorial and start drawing. I think I need at least two more poses between each position. I wonder if it would help to do this on tracing paper? Probably- in order for the walk cycle to work, the character needs to remain consistent, which is something I struggle with. I'd need to do a character study to make sure it remains consistent.
But... this is a start!~
-Yume
Wednesday, December 5, 2012
Walk Cycle
Hello!
Today I'm working on a walk cycle. I took the reference image from http://www.idleworm.com/how/anm/02w/walk1.shtml, and am now cutting it apart to create a layer with each piece. The difficult part is that the steps overlap, and so I have to edit each piece a bit to make it fit with the others, make them the same size, and get rid of the overlap from the previous frame. Still, I'm having a lot of fun figuring this out!! I'll go home and get the lightsaber reference images later, I don't want to let that project fall, but I do want to get this one done.
This is exciting!
-Yume
Monday, December 3, 2012
Lighting GIF
Today I made my first gif. Aren't you proud of me? It's pretty and the text is minty. Anyways, I went and re-took all my lighting images to make them lovely and subdivided and generally pretty. I think they look all right. I also helped a lot of people today. It's difficult explaining technology (which has its own language) to people who speak a different language than English to start out with. Hum dee dum dum dum dum. I think I helped a little, but I'd have to sit with them for a whole class period and go through everything with them in order for them to get it.
It must be difficult being a teacher.
-Yume
It must be difficult being a teacher.
-Yume
Thursday, November 29, 2012
HDRIs and Materials (Really Finished this Time)
 |
| Setting: Park With Cherry Blossom Trees |
 |
| Setting: Bathroom |
 |
| Setting: Subway Station in Japan |
 |
| Material: Chrome, Setting: Subway Station |
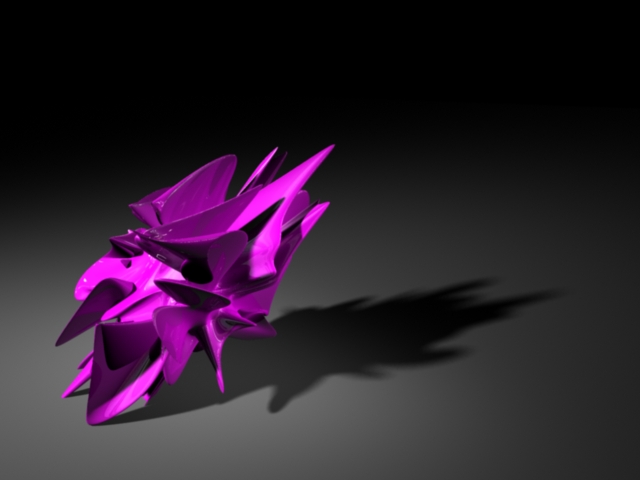 |
| Material: Glossy Plastic, Setting: Subway Station |
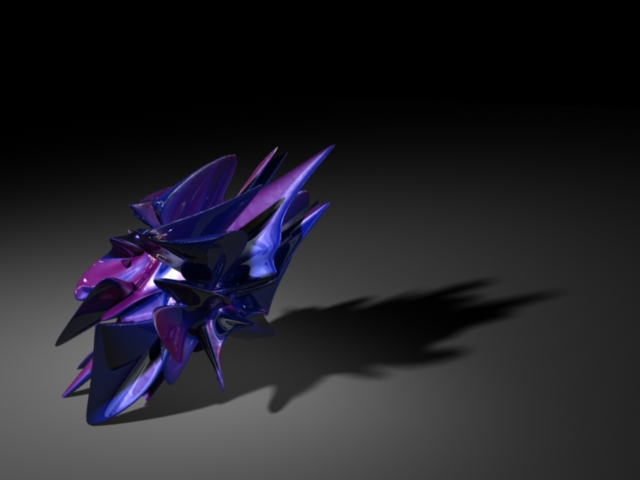 | |||
| Material: Metallic Paint, Setting: Subway System |
HDRI's and Materials
 |
| Setting: Park with Cherry Blossom Trees |
 |
| Setting: Subway |
 | ||
| Setting: Bathroom |
 |
| Material: Metallic Paint, HDRI: Bathroom |
 |
| Material: Glossy Plastic, HDRI: Bathroom |
 | ||
| Matreial: Chrome, HDRI: Bathroom (Note: Mesh was subdivided) |
-Yume
Tuesday, November 27, 2012
HDRI Renders
Here are my first two HDRI's. The top is in a park, the bottom is in a subway. I did one in a bathroom, too, but apparently it didn't save. Now I'm working on materials, but I added a bump map I didn't want to, a complex wood texture. Now I can't seem to get rid of it. I'll have to ask Cornell about it. Or perhaps the top one is in a bathroom? My memory fails me.
Mata ne,
Yume
Tuesday, November 20, 2012
It's the Final Coun---Render
Tada!
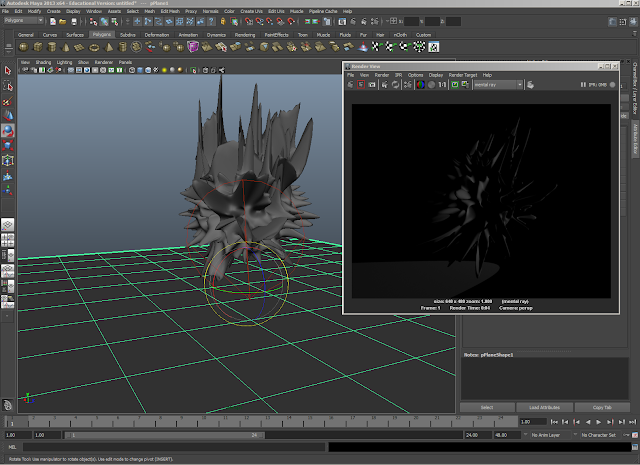
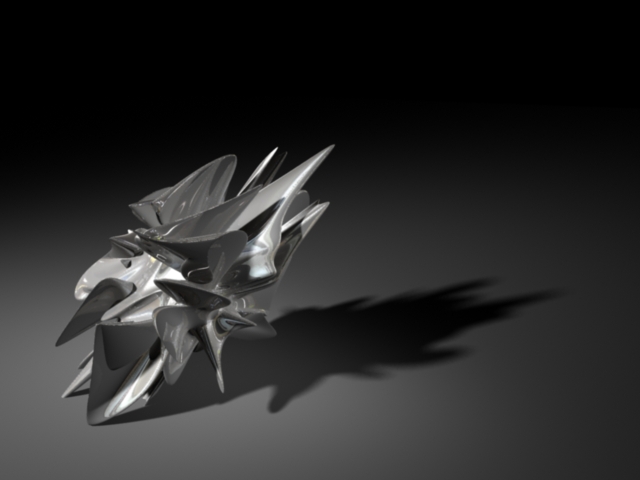
After torturing several cubes, I finally came to properly light one. I still don't like the expansion of light into the scene; there seems to be too much of it to me, but oh well. I also wish the shadows were darker and more pronounced. It was challenging, getting the lights and camera properly placed, but I managed to work it out.
The cube thing is placed at a very orthodox rule of thirds position, but frankly I prefer it zoomed in more, and cutting of pieces of cube- its far more interesting in my opinion. I kind of like the fin-like shapes on the shape, they make for interesting lighting. All right!
Have a lovely turkey day!
-Yume
Friday, November 16, 2012
Would You Believe I Started Again?
Tadaaaaaaaaaaa~
I started again! Again again again. But it's going faster each time. I discovered it was easier to set up the cameras and all the lights from above first, rather than trying to create them later. the shadow is fuzzy and pixelated to my dismay, but so be it. I'll keep going, and it'll look okay the next time I try ^^;;
It looks kind of skullish to me. I wonder why.
_YUmE ><
Wednesday, November 14, 2012
Beginning to Light
Look at it! Isn't she beautiful?
Now I need to go about balancing out the lighting. I'd like a bit more light in the top right corner. Also, I need to figure out how to turn off lights, so that I can work on individual lights, and make them work well. I still haven't really figured out the lighting tools, other than that penumbra angle seems to make the light glow out further. Oh! It adds an edge to the light that's soft. Okay, one tool defined.
Meanwhile, I've been looking around on deviantArt to see how people have used Mudbox. One person said that it doesn't compare to ZBrush whatsoever in terms of ability to handle polygon capacity. People are making pretty interesting things in Mudbox though, and doing anatomy studies. Me? I haven't figured out how not to pick up a sharp ridge ^^;;
Genki de!
-Yume
Thursday, November 8, 2012
Well this is exhausting...
Today I'm still working on my strange creature. Lights and cameras are finnicky things. Its frustrating when they stop being perpendicular to the scene, and I can't get them back. Placement is strange and disorienting too. And the gains for this frustration are thus far slim. Hoorah. I'm sure it will help me in the long run, but for now, ill-lit strange globs are no fun. Especially when you've started over at least four times, and Maya has crashed twice. Meh.
Wish me luck!
Yume
Wish me luck!
Yume
Tuesday, November 6, 2012
The Ever So Tortured Cube
Today I tortured a cube. I smoothed it twice, selected 20 percent of of its vertices, dragged them every which way, and created this horrid beast. Now I'm in the process of lighting it! I'm not sure why it looked so tortured at the moment. I really wish it would live. Oh well. I have a camera and a spotlight made so far. I'm having trouble moving them around, they don't like moving for some reason. Whenever I try to select one, the plane gets selected instead :P
Mata ashita no ashita!
- Yume
Mata ashita no ashita!
- Yume
Friday, October 26, 2012
Whoosh- Finished
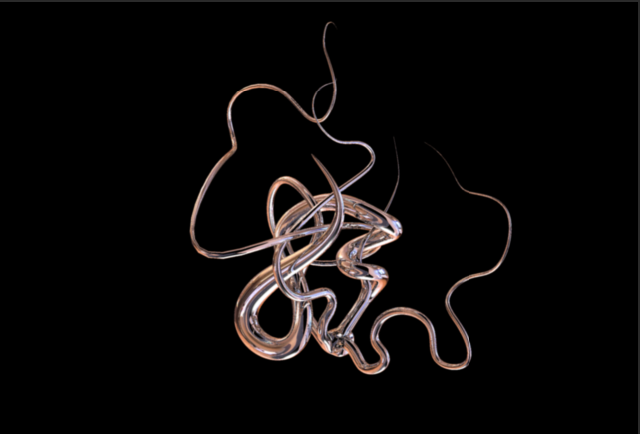
Today I finished up the curve extrusion project. I think it came out pretty nicely. The top one is rendered in copper, the bottom one in water. I also learned how to use hdri maps for lighting. I have an orange ambient light in the center, and a directional light coming from a bottom, and a bathroom was used to render this. I like the shape, it's very flamey.
Hoorah! Time for fall break!
-Yume
Monday, October 22, 2012
Whoosh
So today I was extruding based on curves. It's interesting, and more suited to my tastes as a creator. I like shapes and flow and movement. I just wish I could do it based on pen pressure xD.
I don't know that I like the big fat one, I need to move it around more so that it really curves around the block. I want to get more movement into my curves. Adding vertices is helpful, but it means you have all the more to modify when you move stuff around. Hum. Maybe I'll go through and delete some.
-Yume
Thursday, October 18, 2012
As of Today, I am Caught Up to the Present!
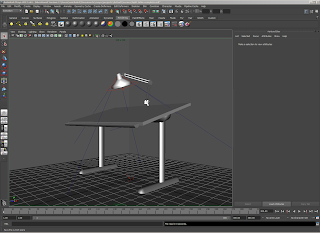
Today I finished up the light table and posted the apple animation. Both animations came out looking strange, with the frames balanced diagonally and split on the screen. The light table was interesting, but I did it slightly differently than asked. If I used the lights in the scene instead of default lighting, it would come out looking like Tuesday's picture, so I just worked with default lighting. I still can't remember the settings used to create an attractive render, so all I have are screenshots for you today. Oh well.
Now that I'm on present time, I'll be able to work in Mudbox a little, hopefully. Of course, as soon as I catch up, something new presents itself.
-Yume
Now that I'm on present time, I'll be able to work in Mudbox a little, hopefully. Of course, as soon as I catch up, something new presents itself.
-Yume
An Animated Apple- Finished
Humm... it's a strange looking video, at least from my perspective. Yet another simple animation, marking the completion of the sad little plasticky looking apple. Yum!
Complete~ Light Table
Tuesday, October 16, 2012
Today
Today I worked in lighting, and rendered a knockoff orange. Hoorah! Tappa tappa tappa tap.
Hmm... I'm kind of getting bored of following tutorials. It's easy enough, but I'd like to do something more interesting. Every time I think I'm close, a new project gets assigned. Oh well, such is the life of a slow worker who's a perfectionist. I haven't got much else to say that's interesting. It was an average day. Tappa tappa tappa
- Yume
Friday, October 12, 2012
The Day Maya First Crashed
Behold this lovely orange, which I recreated three times today. Maya crashed twice, so I'm going to be an expert at birthing oranges by the end of this. I was enjoying playing with settings to make it look as realistic as possible in render view, but now that it's crashed twice, that really isn't my focus anymore. All I want is to finish it.
I finished the apple today, too. I need to figure out how to upload the video, and then you can see the lamest pan shot in the history of pan shots! ^.^ Isn't it exciting?
-Happy Weekend,
Yume
I finished the apple today, too. I need to figure out how to upload the video, and then you can see the lamest pan shot in the history of pan shots! ^.^ Isn't it exciting?
-Happy Weekend,
Yume
Wednesday, October 10, 2012
Finished- Helmet
TA DA! The accursed tedious helmet is finished. Behold the smooth edges. Ignore the few bumps. Admire it. Well... okay. From the picture above, it looks as though the back isn't as smooth as it could be, but from the back it looks fine. The other thing, is I'm wondering how round it should be. It needs to fit nicely on someone's head, so the back shouldn't be round. Should it? Argh... now it's starting to bother me... RRRGh. ...
>.<;;
-Yume
>.<;;
-Yume
Monday, October 8, 2012
Appleappleappleappleapple....
I'm rendering an apple! An ugly, horrible, not at all realistic apple. How dare you Maya, giving me stupid apples. Behold, as I render through various frames of an animation sequence.
Not particularly interesting, huh? That's because its a stupid ugly apple that no one would ever want to eat. Blech. I'm a slow worker today, extremely easily distractable. Roargh.Allright, bye then!
-Yume, the scatterbrained 3D modeler
Thursday, October 4, 2012
Getting Nowhere Fast
I was mistaken as to which instructions to ignore, and so here, I present to thee, a lovely helmet, no more complete or interesting than the last time you saw it. Cornell went over rendering today- I think it's is a cool process. Seeing the models made me happy. Especially chrome and glass- chrome and glass are exceedingly pretty ^.^
I still can't wait to get into mudbox; I'd like to make some models of famous people using it. I think once I get mudbox figured out, I should be able to do it all right.
All right, well, have a lovely weekend!
-Yume
I still can't wait to get into mudbox; I'd like to make some models of famous people using it. I think once I get mudbox figured out, I should be able to do it all right.
All right, well, have a lovely weekend!
-Yume
Tuesday, October 2, 2012
October 2nd 2012
I've got songs stuck in my head today. Hooray ^.^
The helmet mesh is almost complete. I'll have a bit of smoothing and edge defining to do here and there, but for the most part we're done. I'd say perhaps 20 more minutes. It seems I wasn't as productive today as I was last class. It feels like it should have taken me less time than it did to get to this stage, but oh well. I'll be coming and working in open studio later, so hopefully I'll get caught up. I'm kind of out of it. Hmm.
Yume- Aspiring 3D modeler, Digital and Traditional Artist, and Resident Space Cadet
Friday, September 28, 2012
Helmety Helmety Helmet
And the helmet continues! This work is actually kind of satisfying, now that it goes easier for me, and now that I deviate from the tutorials as necessary to make it look satisfying to me. It's strange though, I aligned the grills with those in the picture, but I don't know that I like how it looks... maybe they should be higher. They don't align completely though, the edges aren't placed in a way that they would, so maybe that's why. Anyways, when I get to the end, I'll be able to modify it some to make it attractive and to my liking. Things are going faster for me, but I get the sense that I'm being a little more OCD than the people working around me. Go figure. That's how art(ish) classes work for me.
Tappa tappa tappa tapppa. I like the tappy clicky keyboard very much, so I'm trying to think of more things to write. Tappa tappa tappa tappa tappa...
Typing is fun with a noisy keyboard!
-Yume- Digital and Traditional Artist, Novice 3D Modeler, and Lover of Clicky Keys... clicky clicky clicky
Wednesday, September 26, 2012
Helmet
Today I got much further on the helmet. It's easier the second time around, and I'm more patient. Isn't that the way it always goes, though? I'm currently in the process of creating the mouth guard by process of extrusion. For some reason the marking menu with rotation, thickness, etc. options doesn't come up when I click extrude, so I've made it by thus far, but on the next extrusion, I'll need it. I'll ask Cornell about it next class.
I was a rabbit today. I ate a red bell pepper, because I was hungry. I wasn't satisfied, so I ate a bag of carrots. And still hungry, I consumed an apple. I'm still hungry. -.-;;
-All the best,
Yume- Otaku girl, blogger, digital artist, and human rabbit
I was a rabbit today. I ate a red bell pepper, because I was hungry. I wasn't satisfied, so I ate a bag of carrots. And still hungry, I consumed an apple. I'm still hungry. -.-;;
-All the best,
Yume- Otaku girl, blogger, digital artist, and human rabbit
Monday, September 24, 2012
Helmet- Restart
Hey.
Today I restarted on the helmet. Honestly, I didn't want to go back to the old file. I was too frustrated with it. I just started over, but thankfully, it's going more smoothly this time. There was bad energy associated with that last helmet, I'm sure. So, thus far, I have a cube to look at. It will become a helmet eventually, but for now, it's a lovely cube.
I had an interesting discussion about ... tappatappatappa tappa... I love the sound of this keyboard ^.^ tappa tappa tapp. An interesting discussion about blog traffic today. Let's see if I can get this one to get more. Probably not, but I'll play around with the writing some.
- Yume
Salt Shaker Shaker Shaker- Finished
Heyo!
And I sit here... pondering... MnM's? Or no MnM's? I really want those MnM's... but I really really don't. Gah. I'm too young to be having these sorts of dilemmas. Regardless, this salt shaker is finished. I couldn't figure out how to hide the curves, though, so they're displayed in all their glory. Frankly, I wouldn't want to buy a salt shaker designed like the one we had to make. It's tacky. For shame.
Cornell? The Digital Evolutions blog needs updating. Misused commas everywhere, outdated pictures... unattractive graphic design... not that I said that... moving on :D
Here is the lovely salt shaker shaker.
-Yume- Digital Artist, Aspiring 3D Modeler, Student, Otaku Girl, and Adorer of Smoothies (and peanut mnm's)
Labels:
3D design,
3D model,
3D model maker,
3D modeling software,
animation,
animation software,
art,
art blog,
artist,
digital art,
digital art gallery,
digital artist,
Finished Projects,
learn maya,
maya 2011,
software
Monday, September 17, 2012
Growl Snarl Snarl...
Grrr >.>
You see the blue shape? I was modifying the vertices when I noticed that I should have a few more. As in it should extend downward on the right side by two more grid squares. Darnit. Bllrgh. I'm not sure if there's an easy way to fix this. I'll ask Cornell. If not, I'm starting over!! Joy oh joy :3 I'm having a lovely day!
Meow
- Yume
Labels:
3D design,
3D model,
3D model maker,
3D modeling software,
animation,
animation software,
art,
art blog,
artist,
digital art,
digital art gallery,
digital artist,
learn maya,
maya 2011,
software
The Most Useless Day Ever
Hello!
I spent today growling menacingly at my screen.
The screen didn't seem particularly intimidated.
So then I looked at the computer next to me, envying the fancy software I was not yet allowed to use.
And I returned to growling at my screen.
Hoorah.
(Today, I had to move data from one computer to another. I'm clearly not efficient at this. But hey, maybe I'll be more computer literate after all the newbie-ish mistakes I made. Yay me!! And also, I guess I have the benefit of not having to do this next class period.)
Labels:
3D design,
3D model,
3D model maker,
3D modeling software,
animation,
animation software,
art,
art blog,
artist,
digital art,
digital art gallery,
digital artist,
learn maya,
maya 2011,
software
Subscribe to:
Comments (Atom)


